Decoupage Wooden Boxes: How I Designed a Vintage Bird-Themed Storage Set
Decoupage has always been one of my favourite crafts ever since I first learnt it. It has been more than 13 years, yet the charm of this art has never faded for me. Over the years, I have experimented with decoupage on a variety of surfaces—bottles, boxes, purses, and even wooden tatting shuttles.
This time, I worked on a beautiful set of wooden boxes. I had some very pretty decoupage tissues in my collection, and I was especially drawn to the ones with bird designs. The vintage bird motifs felt perfect for creating a coordinated and elegant storage set.
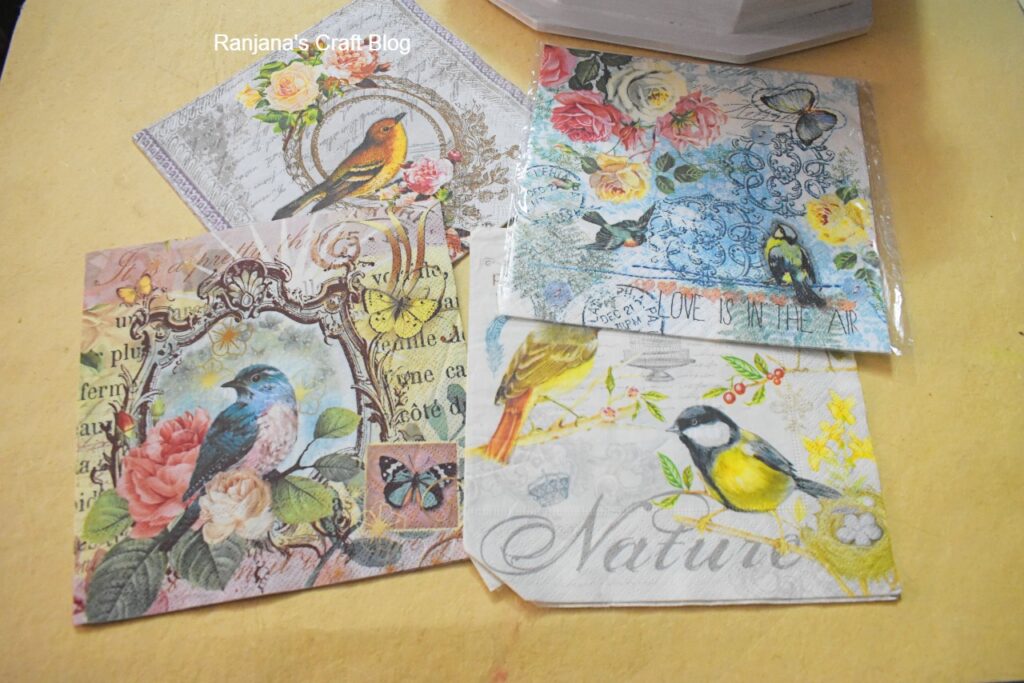
The tissues I had
Why I chose bird designs:
The first reason for choosing these designs was simple—availability. I already had three different decoupage tissues with bird motifs, and they complemented each other beautifully.
Another reason is my personal preference. I have always loved floral and bird designs in decoupage. They bring a soft, elegant, and delicate charm to any home décor piece. What I like most is their versatility—they blend well with almost any background and enhance the overall aesthetic effortlessly.
The wooden boxes decoupaged:
Here are the wooden boxes I decorated using decoupage.
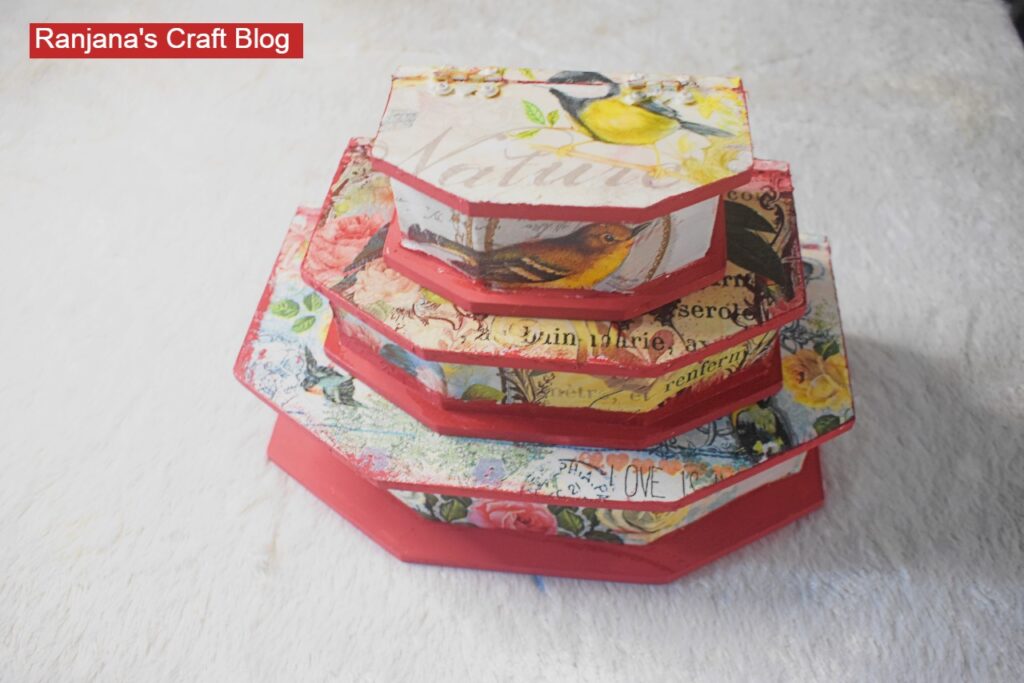
The boxes stacked one above the other
These boxes come in different sizes, and their shape is quite unique. They can be stacked one above the other, which makes them not only functional but also visually appealing. This kind of structure works perfectly for decoupage, as it allows better planning and placement of designs.
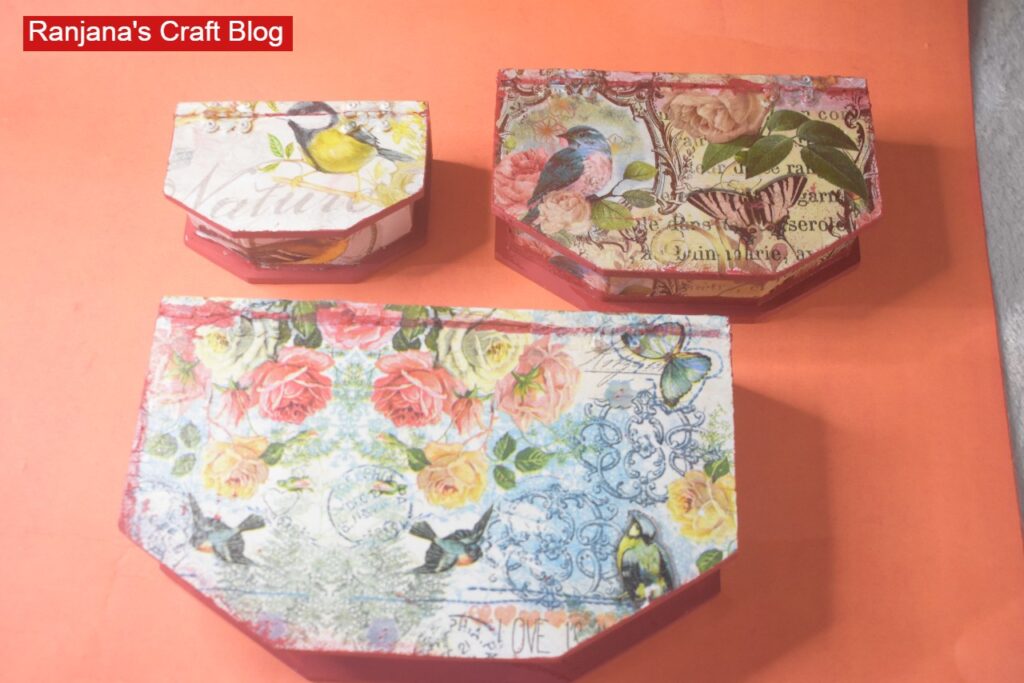
The three boxes
I had three tissue papers with matching bird motifs, and this set of boxes gave me the perfect opportunity to use them effectively.
In decoupage, it is not just the design that matters—the shape of the object plays an equally important role. The placement of motifs changes depending on the surface.:
For example, in the case of bottles, symmetric designs are usually preferred so that the front and back look balanced. On smaller objects like tatting shuttles, tiny prints work better to suit the limited space.
Initially, I thought of using lighter shades for the base. However, I chose a rust color instead, as it gives the boxes a rich vintage look and enhances the beauty of the bird motifs.
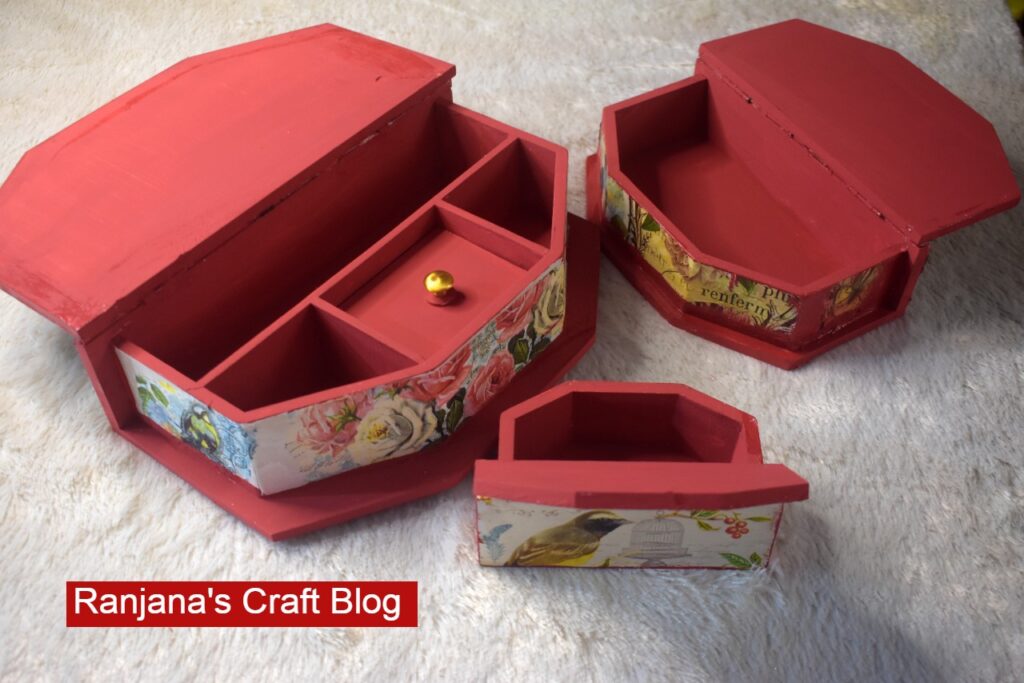
Inside boxes
Practical Uses of These Boxes:
These boxes are highly versatile and can be used for organizing jewellery, small craft items, threads, needles, buttons, and other essentials. At the same time, they also work beautifully as decorative pieces, adding a charming touch to any corner of the home.
Learning and What Can Be Improved
For this project, I used chalk paint for the base. However, the paint had dried slightly, which made it difficult to apply smoothly. Because of this, the finish was not as even as I expected. Next time, I will make sure to use fresh chalk paint to achieve a better and smoother finish.
For the decoupage work, I used Mod Podge, which I personally find to be one of the best adhesives for decoupage projects.
Decoupage is always enjoyable, and what I love most is that it can be applied to everyday useful objects. I have already shared a tutorial on how to do decoupage with tissue paper—you can refer to that if you want to learn the process.
Love, Laugh and Live the life to the fullest,
-Ranjana