How I Redesigned a Plain Saree Using Screen Printing (My Real Process & Results)
This saree belongs to my sister. It is an artificial silk saree with a beautiful floral border. What I really loved about it was the color combination — a rich turquoise blue paired with deep ink blue.
She had worn this saree many times, and we both felt it needed a fresh look. Even though the border was elegant, the body of the saree was quite plain, and something felt missing.
So we decided to redesign it using a different approach, while keeping the original beauty of the saree intact. The idea was not to change it completely, but to enhance it in a way that feels new and more complete.
Why I chose screen printing:
Normally, saree redesign is done using embroidery or fabric painting. I am not an exception — I usually work with borders, patchwork, or even tatting to enhance a saree.
But this time, I decided to try something different and chose screen printing.
The main reason was practicality. Screen printing allows the work to be completed faster compared to embroidery or other techniques. Also, since this saree is made of lightweight artificial silk, it may not support the weight of heavy embroidery, patchwork, or tatting.
So, screen printing felt like the right choice — it could enhance the saree without affecting its softness and fall.
The Process of Screen printing:
The main challenge in this process was selecting a suitable motif that matches the border design, along with choosing the right color that blends well with the saree.
In screen printing, the limitation is that we have to work with the designs that are already available. Unlike embroidery or painting, I could not create a completely new design for this saree.
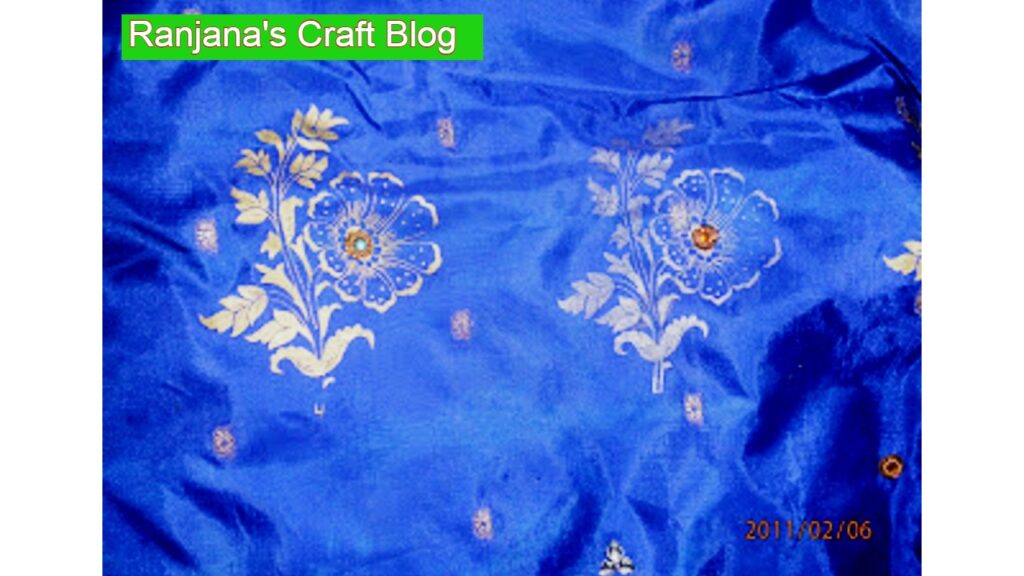
Luckily, I had a floral motif that matched the border design almost perfectly. Since the border had rich gold zari work, I chose gold color for printing so that the motifs would blend naturally with the existing design.
This helped maintain continuity in the saree, instead of making the new design look separate or mismatched.
Placement of the motifs:
Before printing, I marked the motif positions along the border and across the pallu. This step is crucial, because screen printing does not allow easy corrections once the design is applied. I then printed the motifs carefully on the marked areas. Maintaining equal spacing between motifs is very important, as uneven placement can disturb the overall balance of the saree..
I didn’t rush this part — placement matters more than the print itself.
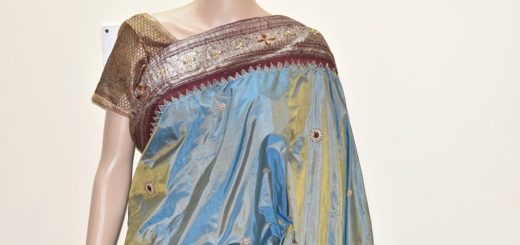
Here is the saree redesigned
The saree redesigned
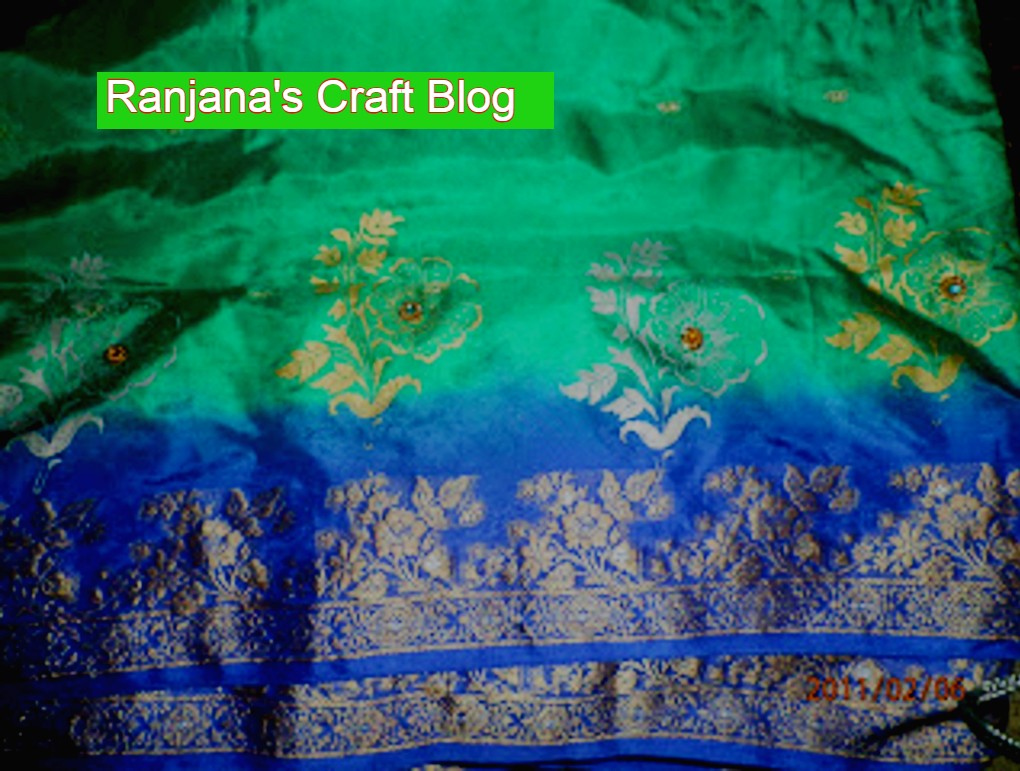
The bodey of the saree, with motifs along the border
Final Enhancement
After completing the screen printing, I added a small finishing touch by placing gold-colored kundans at the center of each floral motif.
This simple addition enhanced the richness of the design and gave a slight embossed effect to the printed motifs. It also connected beautifully with the gold zari border, making the overall design look more cohesive.
With this final step, the saree no longer looks plain — it now has a designer feel, while still remaining light and elegant.
Love, Laugh and Live the life to the fullest,
-Ranjana