School Exhibition Model Idea – A Creative Project That Needs Patience
How This School Exhibition Model Came to Life
Last year, my son participated in a school exhibition, and the given topic was deforestation—a subject that is both important and thought-provoking.
Instead of making a simple chart or poster, we decided to create a detailed miniature model that could visually represent the impact of deforestation in a more engaging way.
The idea was not just to complete a school project, but to tell a story through a model—showing nature, its beauty, and how it gets affected when trees are removed.
This project slowly turned into a creative journey that required planning, patience, and a lot of small detailing.
Here is the school project model I made :
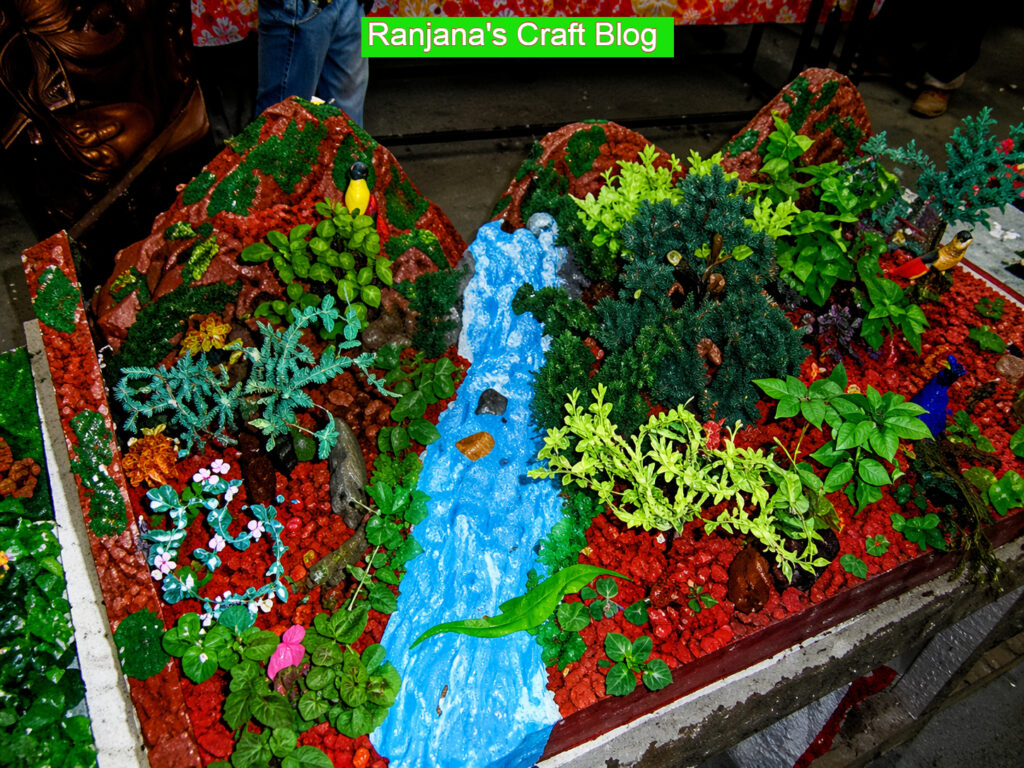
The model of school project
Concept Behind the School exhibition Model
The main theme of this project was deforestation and its impact on nature—a very important topic, especially for young students.
I wanted the model to clearly show two sides of the story. On one side, the beauty of nature—lush greenery, trees, and a peaceful environment. On the other side, the destruction caused by human activities, where trees are being cut down, disturbing the natural balance.
The intention was to create a visual contrast that helps children understand how beautiful nature looks when it is preserved, and how harmful the effects can be when it is destroyed.
Through this model, I hoped to create awareness in a simple and visual way, so that it can leave a lasting impression on young minds
Materials Used for the Model
To create this school exhibition model, I used a combination of basic craft materials and a few ready-made elements:
- Thermocol (Base)
Used as the foundation of the model. It should be at least 2–3 inches thick so that it can hold the weight of all the elements securely. - Plaster of Paris (POP)
Used to create the miniature waterfall and river. It helps in shaping natural textures and gives a realistic look. - Sola Wood
Used for making trees. It is lightweight and easy to shape, making it perfect for miniature models. - Electric Wire (Inner Strings)
The wires inside electric cables were used to form tree branches, as they are flexible and easy to bend into natural shapes. - Green Scotch-Brite Sponge
Used to create the foliage and greenery effect on trees and ground areas. - Readymade Miniatures
Small decorative items like animals and accessories were used to enhance the overall look and bring life to the model.
I used thermocol , plaster of Paris to make the base and the falls, and sola wood and strings inside the electric wire to make the trees. I also used some plastic trees and animals.
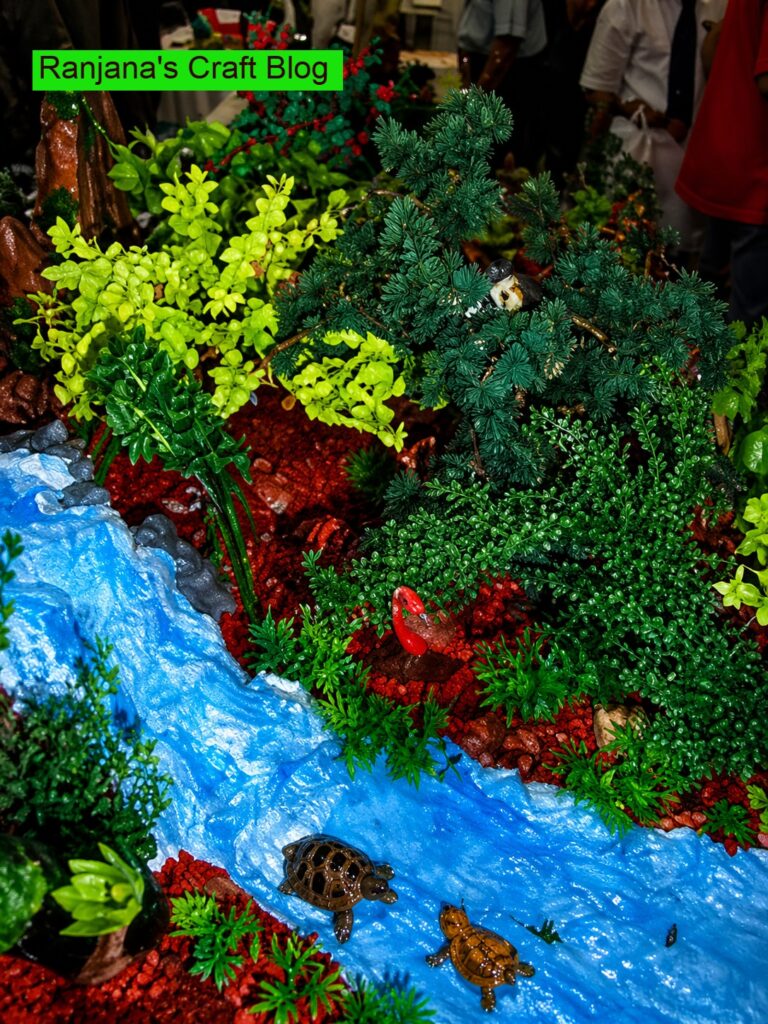
The lusture side of the forest
Step-by-Step Overview of the Model
1. Preparing the Base
The base was created using a 3-inch thick thermocol sheet to give proper height and support. A layer of plaster of Paris (POP) was applied over it to create a natural mud-like surface. While the POP was still wet, small thermocol pieces were placed randomly to add texture. Once dry, the base was painted in earthy tones to resemble soil.
2. Creating the River
A portion of the thermocol base was carved out to form the river path. Over this, POP was applied again and shaped by hand to give a flowing, natural texture. After drying, it was painted in shades of blue to represent water.
3. Making Trees Using Sola Wood
This was the most detailed and time-consuming part. Thin copper wires (taken from electrical wires) were bundled together to form branches. Small pieces of green scrub sponge were attached to these branches to create foliage. Each branch structure was then fixed onto a sola wood base, giving the trees a realistic appearance.
4. Placement of Plants and Miniatures
Miniature plants, animals, and the handmade trees were arranged carefully across the base to create a dense forest effect. The placement was done to maintain a natural and balanced look.
5. Final Detailing and Landscape
To create a hilly background, thermocol pieces were cut and shaped into small hills, then painted in green and mud tones. These were fixed at the back to enhance depth and realism.
6. Representing Deforestation
To highlight the theme, one side of the model was designed to show deforestation. Miniature figures of people cutting trees were placed, with very few plants in that area, creating a strong visual contrast with the lush green forest on the other side.
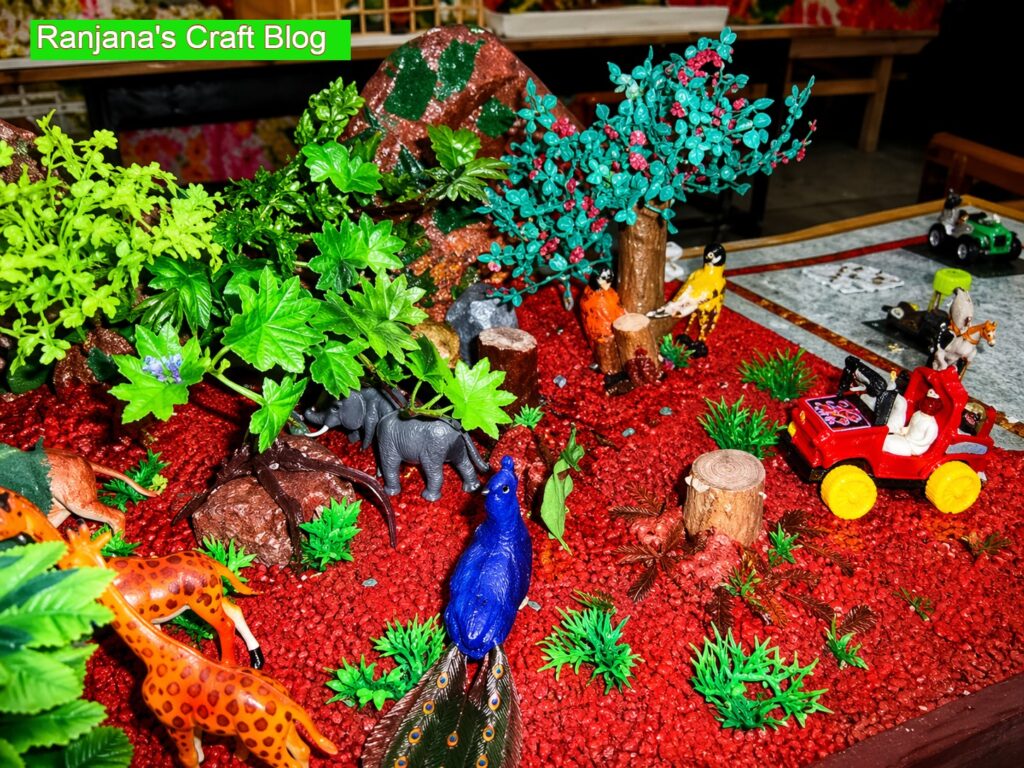
The deforestation
A Journey Worth Every Moment
It took me around 15 days to complete this model. Every day after coming back from the office, I would spend some time working on it. Slowly, piece by piece, it came together—and I truly enjoyed the entire process.
Although my son did not win a prize, the model received a lot of appreciation from everyone at the exhibition. More importantly, he was very happy and proud of the work.
And for me, that mattered the most. His happiness was the real reward.
Love, Laugh and Live the life to the fullest,
-Ranjana
Related School Exhibition Projects:
hai ranjitha your blog is very nice.
beautiful models!
devika
http://craftncreativity.blogspot.in
Grt work…
It is going to help me for our school project display..
As a teacher i must appriciate ur efforts..